| Author |
Message |
Chrometuna
Joined: Aug 14, 2006
Posts: 209
Location: Topeka
Audio files: 3
|
 Posted: Fri Dec 29, 2006 5:30 am Post subject:
Toner Transfer PCB etching WITHOUT Press N Peel Blue Posted: Fri Dec 29, 2006 5:30 am Post subject:
Toner Transfer PCB etching WITHOUT Press N Peel Blue
Subject description: I can't get PnP Blue here, but I found an alternative. |
  |
|
I'm not sure what catagory, or where to post this, so I'm putting it here. (A mod or admin can move it if they see fit....sorry)
This might not be big news for most folks here, but it was for me, as I couldnt find a reasonably cheap way to get Press N Peel Blue paper here.
http://www.fullnet.com/~tomg/gooteepc.htm#1
That page has a pretty good and informative lecture on making PCBs with toner transfer paper, and talks about what brands are best.
Looks a whole lot cheaper, and quicker to get, then ordering 5 sheets of PnP Blue for $20 bucks from England.
I am going to give this a try tomarrow. I'll post the results if anyone is interested....but maybe this has been discussed extensivly elsewhere on this forum, and I just didnt find it in my searches?
Cheers
bob c |
|
|
Back to top
|
|
 |
Uncle Krunkus
Moderator

Joined: Jul 11, 2005
Posts: 4761
Location: Sydney, Australia
Audio files: 52
G2 patch files: 1
|
| Posted: Fri Dec 29, 2006 6:03 am Post subject:
|
|
|
That link doesn't go anywhere for me. (cannot find server error)
_________________
What makes a space ours, is what we put there, and what we do there. |
|
|
Back to top
|
|
|
blue hell
Site Admin

Joined: Apr 03, 2004
Posts: 24423
Location: The Netherlands, Enschede
Audio files: 297
G2 patch files: 320
|
| Posted: Fri Dec 29, 2006 7:58 am Post subject:
|
|
|
The link did work here after a few tries, so maybe it's just slow ?
_________________
Jan
also .. could someone please turn down the thermostat a bit.
 |
|
|
Back to top
|
|
|
crashlander42

Joined: Oct 21, 2006
Posts: 292
Location: Orlando, FL (US)
|
| Posted: Sat Dec 30, 2006 12:20 am Post subject:
toner transfer |
|
|
I've used toner transfer for everything i've built. It's really easy once you get the hang of it. My only tips would be to make sure you use the crappiest photo paper. The thick stuff that has the real plastic-ish side, make sure everything is printed DARK, and make sure the copper is CLEAN.
My boards come out real nice. Real sharp edges. Never had a problem with shorts.
Let me know if you have any questions 'cause i've done a lot of this. |
|
|
Back to top
|
|
|
Chrometuna
Joined: Aug 14, 2006
Posts: 209
Location: Topeka
Audio files: 3
|
| Posted: Sat Dec 30, 2006 4:56 am Post subject:
Re: toner transfer |
|
|
| crashlander42 wrote: | I've used toner transfer for everything i've built. It's really easy once you get the hang of it. My only tips would be to make sure you use the crappiest photo paper. The thick stuff that has the real plastic-ish side, make sure everything is printed DARK, and make sure the copper is CLEAN.
My boards come out real nice. Real sharp edges. Never had a problem with shorts.
Let me know if you have any questions 'cause i've done a lot of this. |
I got Canon Photo Paper Plus Glossy.
So far it looks really good.
I had to go to Kinkos to photocopy on to it. And other then me doing a super-crappy job laying out and copying it, it worked fine for that.
I have my 4X6 peice of copper clad (Radio Shack standard double sided stuff) And I cleaned it up using a green scouring pad and some Ajax, then cleaned it up with dish soap and water, rinsed it well, wiped it off with a clean paper towel and set it to dry.
Then I put down the photo paper, put a sheet of paper over that, and ironed it on the highest setting for five minutes or so.
Then I plopped it into a little tub of warm soapy water.....in less then a minute 75% of the paper just practically fell right off. A little more soaking and all but a couple of spots came off very easily. Ive got it soaking a bit more right now, and then I'll go back and peel and pick off the rest and use a toothbrush on it.
I noticed a couple of spots, traces that I'll have to go back over with a sharpie. I am pretty sure that is mostly due to my crappy photo copying job.
I had to print out from the Kinkos computers, at .40 cents a minute, and .45 cents a copy, and they came out the wrong size, so I had to play with the photocopiers reduction to get it down to the right size. I had the forthought to bring an IC socket and one of those little IC bread/perf-board things with me so I could check the size by the holes for the pins/legs. It was that what I ended up with was really a fourth generation photocopy of what I had printed out on the lazar printer. So THAT is probably the main reason why some of the traces are weak.
Next time around, I'll make sure I lay out the artwork at home, copy it to disk, and then just print out directly onto the photo paper in the lazer printer. (After running a test sheet first to make sure of the size) When I lay out the artwork, I think I'll use photoshop or something to thicken up some of the traces.
I wish my digital camera was working, so I could document this process.....but I think anyone who has read this far into this probably already has seen the press n peel documentation...the process is so very similar.
Cheers
bob c |
|
|
Back to top
|
|
|
Chrometuna
Joined: Aug 14, 2006
Posts: 209
Location: Topeka
Audio files: 3
|
| Posted: Sat Dec 30, 2006 8:00 am Post subject:
Re: toner transfer |
|
|
| Chrometuna wrote: |
I noticed a couple of spots, traces that I'll have to go back over with a sharpie. I am pretty sure that is mostly due to my crappy photo copying job. |
SUCK-SESS!
The whole process went just like it is supposed to!
Acid eats away the copper that is exposed, and not the copper that is covered, or resisted.
Thats exactly whats supposed to happen. So in THAT respect, this was a success!
Now, I have yet to see if I have a USEABLE and WORKING PCB.
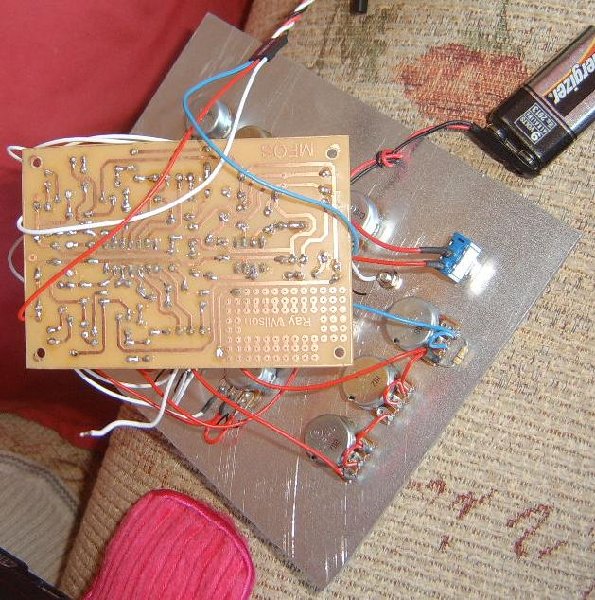
(BTW: I am doing Lorenzo's WSG PCB layout.....thats the main thing. Except the blank PCB I got is 4 X 6 inches, and Lorenzo's layout is wider then that, so I had to "off-load" a few things from that, but I noticed that I had plenty of space at the top of the board, so I laid out TWO APC's and TWO "Sound effects generators" from http://www.geocities.com/worthekik//segen.html so I am going to have this "gang" of toys on one board! and maybe once built, I'll start crossing wires between them and seeing what blows up, or what does somethin cool....can I run them ALL from one 9v battery?)
Now here is where the etchant worked TOO well, and where the resist didnt work well enough:
Sharpie touch-ups on weak traces.
I should have put them on thicker, and maybe a couple of 'coats' (Going over the lines a couple of times) and maybe I should let the sharpie ink dry a bit longer before etching?
Now the next step will be to clean off the resistant: The ink toner and the sharpie. What should I use for that? Ive seen acetone mentioned?
And once THAT is cleaned up, I guess I will have to go buy a rediculously expensive "conductive pen" and re-draw the weak or broken traces.
Does anyone have much experience with those conductive pens? Its some kind of metalic ink, right?
And then it is time to drill a couple hundred tiny little holes....without the benifit of a drill press!
So, my review is: The Canon Photo Paper Glossy is workable. This was my first attempt EVER, and it seemed to go well, with the exceptions of whats mentioned above....and I really blame most of that on my original sloppy copying job.
I got 20 sheets for $10 bucks at Office Depot. Thats WAY cheaper then Press N Peel blue, and I didnt have to mail order it. Press N Peel Blue is probably easier to work with (No soaking to get it off of the board after ironing) but this works.
Now the next thing is to talk about PCB layout software. Sure, I could do some simple searching around this forum and find everything out all by my little DIY self.
I like Lorenzo's layout, and I'm thankful he shared that with the world, but I'd have prefered a layout with "off board" components like pots and switches, and a smaller board. Is there anything that I can just 'feed in a schematic' and it spits out the layout?
Cheers!
bob c....a self-satisfied tuna |
|
|
Back to top
|
|
|
henq
Joined: Nov 29, 2006
Posts: 23
Location: holland
|
| Posted: Sun Dec 31, 2006 12:28 pm Post subject:
|
|
|
i only did 1 pcb that way and had some "broken" traces too.
i just soldered some sollid wire over them (like jumpers)
got no cam right now so i cant show a pic of that... |
|
|
Back to top
|
|
|
Fenris

Joined: Jul 30, 2008
Posts: 145
Location: Horbury. UK
Audio files: 1
|
|
|
Back to top
|
|
|
skylab76

Joined: Dec 30, 2007
Posts: 38
Location: Austin
|
| Posted: Sun May 31, 2009 9:15 pm Post subject:
|
|
|
Actually I've been thinking about creating my own PCBs . Thanks Fenris for reviving the thread. I just hope my ratshack has Ferric Chloride because I heard that some of the stores are not carrying it. Do you use that chem or do you use muriatic acid & hydrogen peroxide ?
Side note: In doing research today I got funny results from Google because I accidently typed , "How to make PCP" I'm probably on some FBI watch list now because of this and my googling of chemicals. |
|
|
Back to top
|
|
|
Fenris
Joined: Jul 30, 2008
Posts: 145
Location: Horbury. UK
Audio files: 1
|
| Posted: Mon Jun 01, 2009 7:04 am Post subject:
|
|
|
Hi Skylab
Yes, I use ferric-chloride. But only because I was given it  . My other weapon of choice, down to whats available at the time, is persulphate(?) I used it once years ago. It's a clear solution that works just as well as the ferric. . My other weapon of choice, down to whats available at the time, is persulphate(?) I used it once years ago. It's a clear solution that works just as well as the ferric.
Rapid online do sell ferric in powder form as well as liquid. I recommend the powder form for ease of storage. and you can mix what you need and it does go a long way.
My only tip is to sit the etching tray in another tray that is filled with hot water. This warms the ferric up and speeds the process. Do take care to ensure good ventilation.
The only other tip is to suspend you PCB face down in the etchant as this also helps speed the process along. Read all safety precaution data for the materials involved in the process.
regards
Fenris |
|
|
Back to top
|
|
|
skylab76
Joined: Dec 30, 2007
Posts: 38
Location: Austin
|
| Posted: Mon Jun 01, 2009 3:37 pm Post subject:
|
|
|
Thanks for the tips Fenris (especially the bit about the warm water). And they do have it at Radioshack. I'll do a dry run with an APC circuit, then move on to some of Rays stuff.
Regards, |
|
|
Back to top
|
|
|
Fenris
Joined: Jul 30, 2008
Posts: 145
Location: Horbury. UK
Audio files: 1
|
| Posted: Mon Jun 01, 2009 4:34 pm Post subject:
|
|
|
Hi Skylab
Glad I could help. I 'officially' made my first PCB around a year ago. luckily it took only 2 attempts with the photo paper method Patience and practice will pay dividends. Good luck and above all have fun,
regards
Fenris |
|
|
Back to top
|
|
|
diablojoy

Joined: Sep 07, 2008
Posts: 809
Location: melbourne australia
Audio files: 11
|
| Posted: Tue Jun 02, 2009 3:05 am Post subject:
|
|
|
PNP Blue is far cheaper if you buy 100 sheets works out at roughly
USD $1.00 per sheet
also standard general purpose thinners from a hardware store removes the toner after etching very quickly and is very cheap
To clean the board before transfer lightly sand with wet and dry paper
the copper must be flat and smooth with no burrs to get the best results don't over do it though 1000 grit for the copper face is good
600 grit works well to remove any burrs on the edges of the copper [use it wet ] rinse in cold water and then spray over with methalated spirit till it stops all beading and runs off the face in a sheet
pat dry with paper towel .do not touch the copper after this step
do not over heat with the iron it causes blurring if you place a piece of white copy paper over the top and then iron the board when you can see the cct imprint in the paper clearly its a about right .place under cold running water to cool the board cut 3 sides of the transfer with an exacto knife and then slowly slide another sheet of copy paper between the board and the transfer with the transfer facing up you can instantly see any area's that are not quite right and touch up by reheating with a flat faced tip on a soldering iron if only small or reapplying the clothes iron if needed without disturbing the location of the transfer . when using ferric chloride i put the board in face up quite often the middle of the pads where you will be drilling sort of glow brighter than the rest this is caused by surface tension over the small area involved use a pin to prick the centre lightly so they go dark [needs to be done under a very bright light and viewed from various angles to be seen] the hole centre's will then etch correctly. after etching just wipe the board with any sort of enamel paint thinners and then rinse off and you are ready to drill i use a dremell in a dremmel work stand [sort of like a mini drill press] to do this.
everything else i have tried is either too inaccurate or too expensive
cheers
diablo |
|
|
Back to top
|
|
|
Fenris
Joined: Jul 30, 2008
Posts: 145
Location: Horbury. UK
Audio files: 1
|
| Posted: Tue Jun 02, 2009 6:36 am Post subject:
|
|
|
Good tips there Diablojoy. I use fine steel wool to prep my boards and a mild detergent. I think I should give the meths ago on my next one.
PnP Blue - How did you avoid the crinkling and shrinkage at the edges? That's the only other problem I had with it. Temperature?
regards
Fenris |
|
|
Back to top
|
|
|
diablojoy
Joined: Sep 07, 2008
Posts: 809
Location: melbourne australia
Audio files: 11
|
| Posted: Tue Jun 02, 2009 8:45 pm Post subject:
|
|
|
yeah probably temp is too high try using a lower setting on the iron
on the iron i use it seems to work best on the wool setting
unfortunately irons tend to vary quite a lot so you will have to do
some test runs to find what setting works best
i have the pnp blue face up when i tape and tape the board
on with just normal masking tape pushing it well into the sides
i tape all four sides
if your getting lines that dont look crisp or have a smudged appearance
to the edges it usually means its getting too hot or you are ironing the board for too long |
|
|
Back to top
|
|
|
Fenris
Joined: Jul 30, 2008
Posts: 145
Location: Horbury. UK
Audio files: 1
|
| Posted: Wed Jun 03, 2009 3:22 am Post subject:
|
|
|
Perhaps I should dig out my R/C model aircraft covering iron. The dial has the temperature in degrees around the dial with 3 colour LED readiness indication, a smaller footprint and teflon coating to boot
regards
Fenris |
|
|
Back to top
|
|
|
zoid
Joined: Jul 30, 2009
Posts: 2
Location: USA
|
|
|
Back to top
|
|
|
Fenris
Joined: Jul 30, 2008
Posts: 145
Location: Horbury. UK
Audio files: 1
|
| Posted: Mon Aug 10, 2009 12:33 pm Post subject:
|
|
|
Heres one link. Google 'how to toner transfer' it will provide you with reams of links. I tried this for the first time early last year with an iron and it took only 2 attempts to get a viable PCB to etch. I have since converted a hot laminator by removing it's thermostat and replacing it with the thermostat from the iron I used to use. It works a treat. I have PCB's coming out of my ears, and yes, the corners hurt. 
http://www.instructables.com/id/Cheap-and-Easy-Toner-Transfer-for-PCB-Making/
regards
Fenris |
|
|
Back to top
|
|
|
|

 Forum index » DIY Hardware and Software » MusicFromOuterSpace.com designs by Ray Wilson

 .
.