| Author |
Message |
Skrog Productions

Joined: Jan 07, 2009
Posts: 1225
Location: Scottish Borders
Audio files: 160
|
 Posted: Mon Apr 07, 2014 10:34 am Post subject:
CGS89 Gate Sequencer's & some division Posted: Mon Apr 07, 2014 10:34 am Post subject:
CGS89 Gate Sequencer's & some division
Subject description: For the Blue tower |
  |
|
Hi there 
Recently I've been patching Gates from 4 of my diy sequencers through a sequential switch for some changing patterns for 1 bass line , I really like the changing patterns but I'd also like to free up 3 sequencers .
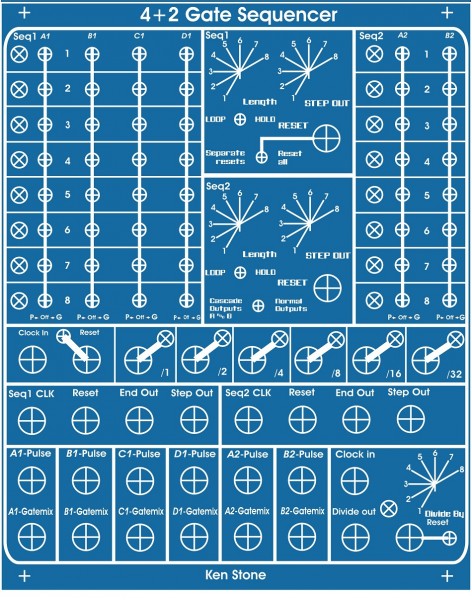
While browsing the net for diy solutions , a popular search return was the CGS89 Gate sequencer with a couple of add on switch banks/ buffers (like Thomas White's 4 channel CGS89).
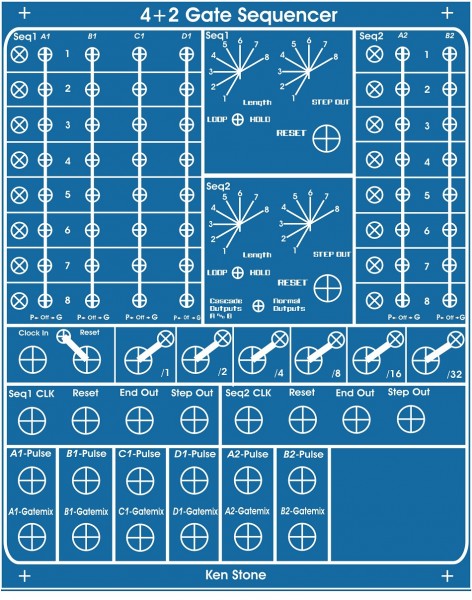
spent the last few weekends trying ideas for my panel, I think I'm close now , Ordered some boards from Ken and I need to knock together a couple of veroboard divider circuits , one is on the test layout panel already , the space at the lower right is for a rotary selectable/ single out divider.
I'm going for a 4 channel for sequencer 1 and a 2 channel for sequencer 2 , I'm limited by a panel of 250mm high by 200mm wide for this module , I would have made Seq2 a 4 channel too but I will be tight for space , also there are no individual step outs , I had a long hard think about them and decided I'd be using probably just 1 out per cycle , so I went for a rotary to select the desired step & 1 out socket (to trigger my burst generator ) .
Here is the blue test panel layout so far ....
Dave.
| Description: |
|
| Filesize: |
408.9 KB |
| Viewed: |
957 Time(s) |
| This image has been reduced to fit the page. Click on it to enlarge. |
|
|
|
|
Back to top
|
|
 |
Skrog Productions
Joined: Jan 07, 2009
Posts: 1225
Location: Scottish Borders
Audio files: 160
|
| Posted: Sat Apr 12, 2014 10:27 am Post subject:
|
|
|
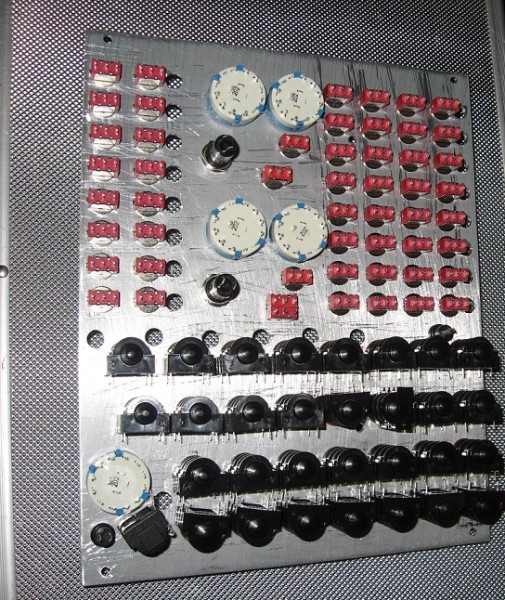
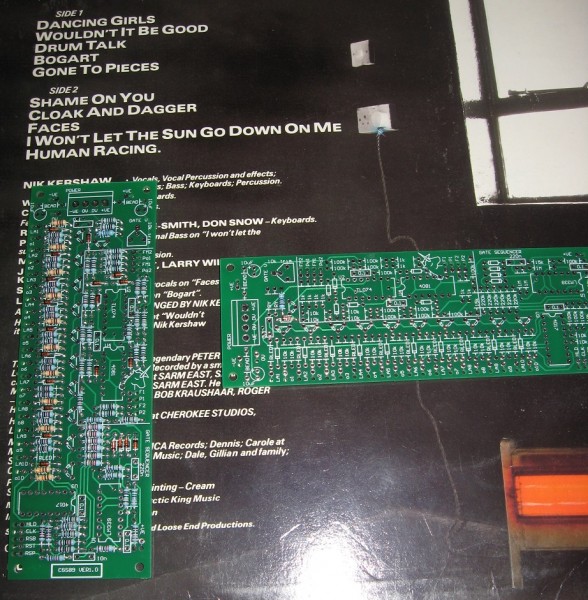
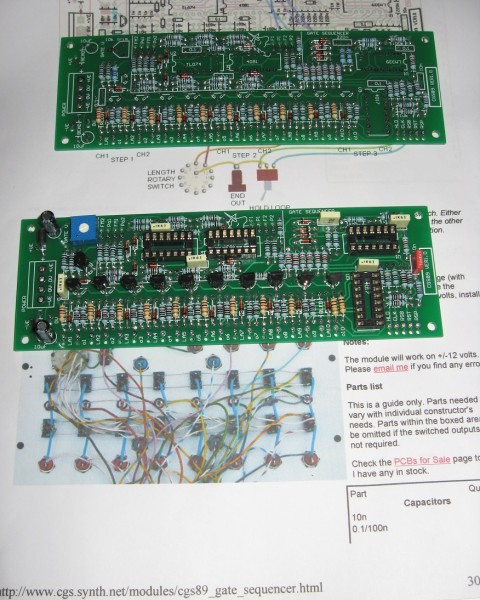
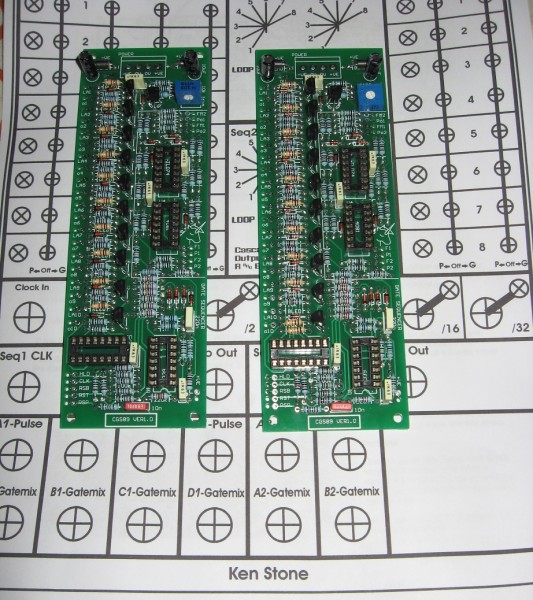
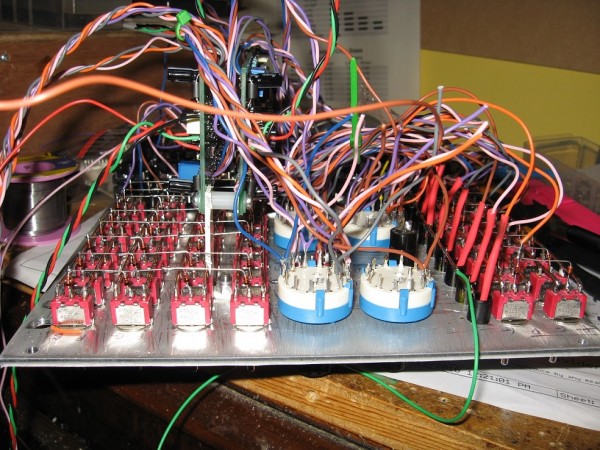
CGS boards arrived yesterday , , decided to stuff the sequencer boards with components this afternoon & make an order to Rapid electronics for some panel switches & sockets etc.
Hope to get panel finalised through the week and get drilling next week .
Dave.
| Description: |
|
| Filesize: |
448.51 KB |
| Viewed: |
873 Time(s) |
| This image has been reduced to fit the page. Click on it to enlarge. |
|
| Description: |
|
| Filesize: |
423.31 KB |
| Viewed: |
930 Time(s) |
| This image has been reduced to fit the page. Click on it to enlarge. |
|
| Description: |
|
| Filesize: |
456.52 KB |
| Viewed: |
887 Time(s) |
| This image has been reduced to fit the page. Click on it to enlarge. |
|
|
|
|
Back to top
|
|
|
Skrog Productions
Joined: Jan 07, 2009
Posts: 1225
Location: Scottish Borders
Audio files: 160
|
|
|
Back to top
|
|
|
Skrog Productions
Joined: Jan 07, 2009
Posts: 1225
Location: Scottish Borders
Audio files: 160
|
| Posted: Sat Apr 19, 2014 7:48 am Post subject:
|
|
|
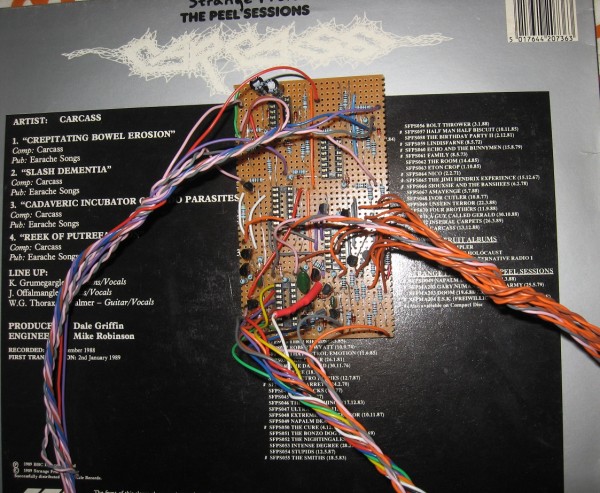
Extra buffers for gatemix / pulse rows C1 & D1 and a 4024 divider (Fonik) & 4017 divider (Yusynth) done & wired ready on vero-board .
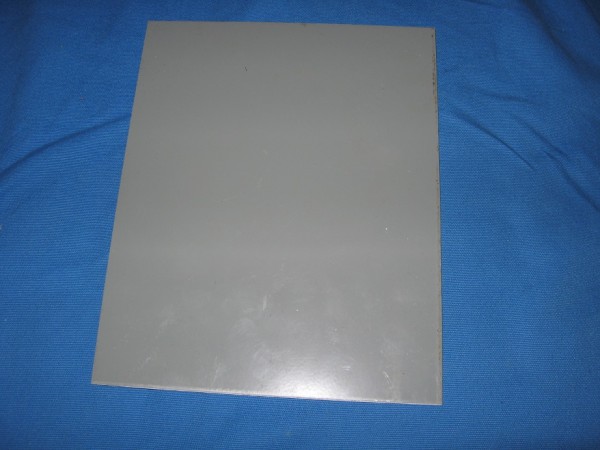
Also got an off cut of 3mm aluminium 250mm X 200mm from Engineers/ metal workshop in town, needs a clean with solvent then ready for the drill template mid week after work.
Dave.
| Description: |
|
| Filesize: |
483.08 KB |
| Viewed: |
896 Time(s) |
| This image has been reduced to fit the page. Click on it to enlarge. |
|
| Description: |
|
| Filesize: |
203.96 KB |
| Viewed: |
881 Time(s) |
| This image has been reduced to fit the page. Click on it to enlarge. |
|
|
|
|
Back to top
|
|
|
Skrog Productions
Joined: Jan 07, 2009
Posts: 1225
Location: Scottish Borders
Audio files: 160
|
| Posted: Wed Apr 23, 2014 2:33 pm Post subject:
|
|
|
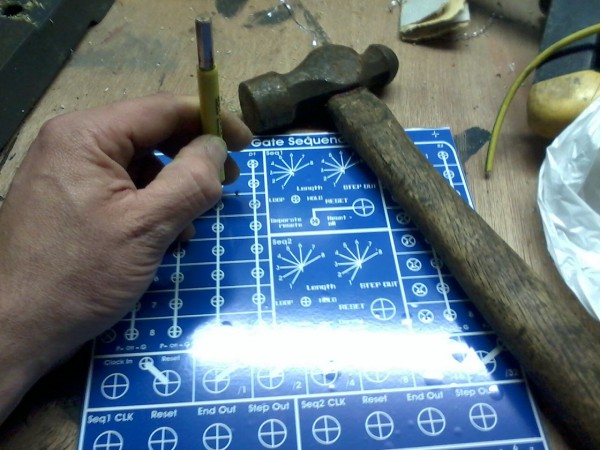
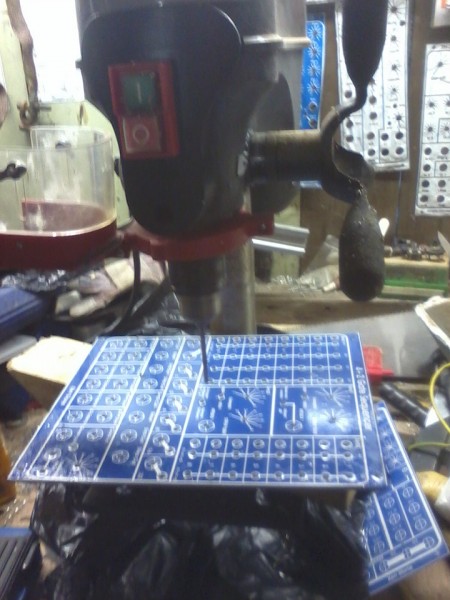
Got the stickers done , 2 sets one drill template & one clean finish .
Raced to the shed after work and centre punched the panel(s) , started with the 4mm drill and piloted all crosshairs , then went over the switches / sockets with 6.5mm bit , then 8mm bit for led bezels , and finally 11mm for the 1/4" sockets , I give the face of the template sticker a good spray with cutting oil, messy , but the drills glide through the 3mm alum plate , there are burrs on the exit side but easy to take off , I use a very sharp old wood chisel to plane them off , then the back side of the panel gets a quick rub with wet n dry sandpaper , finally a spray all over with automotive carburettor cleaning spray , great for getting fine grit & swarf off the front surface , don't light a cigarette after spraying  , a final wash with soapy warm water and the plate is good for the final finish sticker application . , a final wash with soapy warm water and the plate is good for the final finish sticker application .
More at the weekend .
Dave.
| Description: |
|
| Filesize: |
287.89 KB |
| Viewed: |
843 Time(s) |
| This image has been reduced to fit the page. Click on it to enlarge. |
|
| Description: |
|
| Filesize: |
228.08 KB |
| Viewed: |
895 Time(s) |
| This image has been reduced to fit the page. Click on it to enlarge. |
|
|
|
|
Back to top
|
|
|
Skrog Productions
Joined: Jan 07, 2009
Posts: 1225
Location: Scottish Borders
Audio files: 160
|
|
|
Back to top
|
|
|
Skrog Productions
Joined: Jan 07, 2009
Posts: 1225
Location: Scottish Borders
Audio files: 160
|
|
|
Back to top
|
|
|
The Bad Producer

Joined: Mar 08, 2009
Posts: 282
Location: The Manhole
|
|
|
Back to top
|
|
|
Skrog Productions
Joined: Jan 07, 2009
Posts: 1225
Location: Scottish Borders
Audio files: 160
|
| Posted: Tue Apr 29, 2014 12:35 pm Post subject:
|
|
|
| The Bad Producer wrote: | | Great project and love the write up! |
thanks , it's going smoothly so far, hope to have the wiring done by the weekend...... then de-bug if needed
Dave |
|
|
Back to top
|
|
|
Skrog Productions
Joined: Jan 07, 2009
Posts: 1225
Location: Scottish Borders
Audio files: 160
|
| Posted: Tue Apr 29, 2014 12:46 pm Post subject:
|
|
|
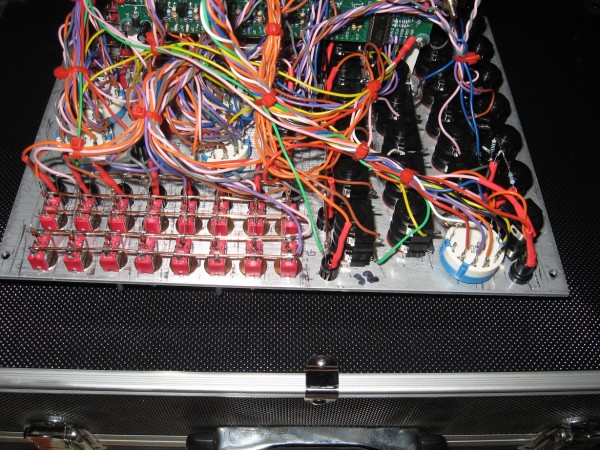
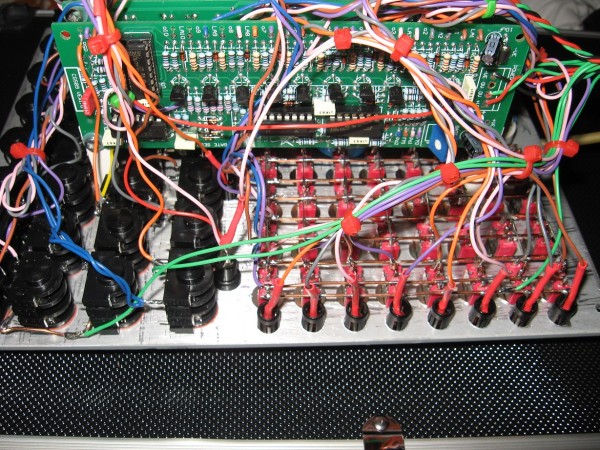
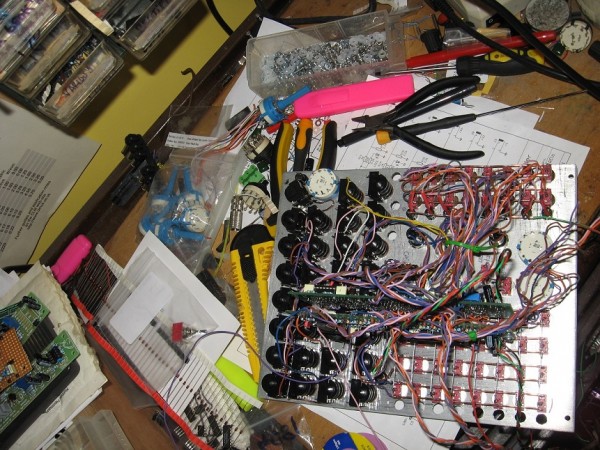
Wires..............
The tedious but necessary part of overtly switchy & sockety projects . a few pics of the wiring stage.
| Description: |
|
| Filesize: |
365.1 KB |
| Viewed: |
728 Time(s) |
| This image has been reduced to fit the page. Click on it to enlarge. |
|
| Description: |
|
| Filesize: |
324.01 KB |
| Viewed: |
691 Time(s) |
| This image has been reduced to fit the page. Click on it to enlarge. |
|
|
|
|
Back to top
|
|
|
PHOBoS

Joined: Jan 14, 2010
Posts: 5916
Location: Moon Base
Audio files: 709
|
|
|
Back to top
|
|
|
wackelpeter
Joined: May 05, 2013
Posts: 461
Location: germany
Audio files: 10
|
| Posted: Wed Apr 30, 2014 1:01 pm Post subject:
|
|
|
second that what Phobos said, looks really impressive and also like a lot of work... guess i would spend a year to build such a thing
but one question: this is only giving variable gate or trigger pulses no CV's right?
i'd also like to see/hear what you're able to do with this nice pattern generator/sequencer when ready... |
|
|
Back to top
|
|
|
Skrog Productions
Joined: Jan 07, 2009
Posts: 1225
Location: Scottish Borders
Audio files: 160
|
| Posted: Thu May 01, 2014 12:35 pm Post subject:
|
|
|
| PHOBoS wrote: | | looks good Dave! |
Thanks Phobos |
|
|
Back to top
|
|
|
Skrog Productions
Joined: Jan 07, 2009
Posts: 1225
Location: Scottish Borders
Audio files: 160
|
| Posted: Thu May 01, 2014 12:55 pm Post subject:
|
|
|
| wackelpeter wrote: | second that what Phobos said, looks really impressive and also like a lot of work... guess i would spend a year to build such a thing
but one question: this is only giving variable gate or trigger pulses no CV's right?
i'd also like to see/hear what you're able to do with this nice pattern generator/sequencer when ready... |
Hi ,thanks , yes that's right , just gates & pulses.
This unit will mainly be used with a sequential switch and 1 or 2 separate diy sequencers in my system .
Dave. |
|
|
Back to top
|
|
|
Skrog Productions
Joined: Jan 07, 2009
Posts: 1225
Location: Scottish Borders
Audio files: 160
|
| Posted: Thu May 01, 2014 1:11 pm Post subject:
|
|
|
Yessss.
On the home stretch now , tested & powered up the CGS boards last night , both working a treat , yay ,Quick test set up as 2 X 8 step sequencers, after testing both, I tried patching end out to reset in on each sequencer (1 to 2 / 2 to 1) + setting both the switches to hold and it works great as a 16 step with the outs "or" switched to A1 & B1, fab .
Now to connect up & test / debug my veroboard then cable tidy with some ties and give final checks / tests .
pics & some sounds of it working the modular in next post over the weekend.
Dave. |
|
|
Back to top
|
|
|
wackelpeter
Joined: May 05, 2013
Posts: 461
Location: germany
Audio files: 10
|
| Posted: Thu May 01, 2014 1:19 pm Post subject:
|
|
|
if someone had read the description and the title carefully this question would be obvious... my fault sorry... but neverless thank's for your reply even to such stupid questions...  |
|
|
Back to top
|
|
|
Skrog Productions
Joined: Jan 07, 2009
Posts: 1225
Location: Scottish Borders
Audio files: 160
|
| Posted: Thu May 01, 2014 2:28 pm Post subject:
|
|
|

no such thing as a stupid question |
|
|
Back to top
|
|
|
Skrog Productions
Joined: Jan 07, 2009
Posts: 1225
Location: Scottish Borders
Audio files: 160
|
|
|
Back to top
|
|
|
Skrog Productions
Joined: Jan 07, 2009
Posts: 1225
Location: Scottish Borders
Audio files: 160
|
| Posted: Sat May 03, 2014 10:08 am Post subject:
|
|
|
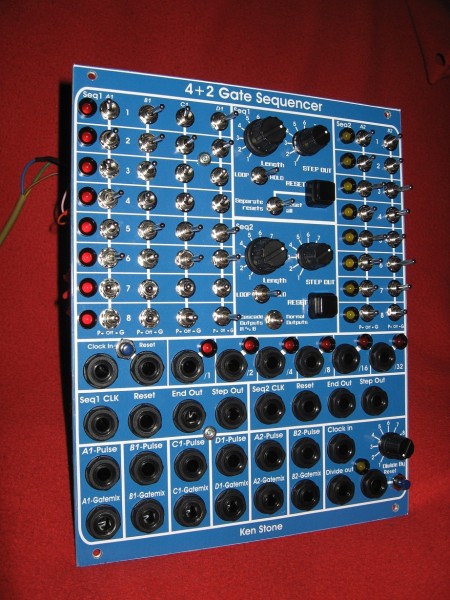
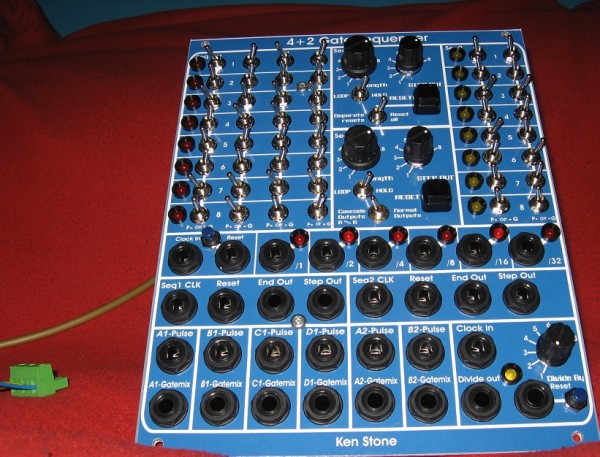
Quick pic of the finished front panel of the dual CGS89 sequencer (Ken Stone)
Middle divider (Fonik) and the lower right single divider (Yusynth).
Before installation into the modular, a pic of it relaxing on the couch
| Description: |
|
| Filesize: |
529.65 KB |
| Viewed: |
630 Time(s) |
| This image has been reduced to fit the page. Click on it to enlarge. |
|
| Description: |
|
| Filesize: |
279.79 KB |
| Viewed: |
666 Time(s) |
| This image has been reduced to fit the page. Click on it to enlarge. |
|
|
|
|
Back to top
|
|
|
Skrog Productions
Joined: Jan 07, 2009
Posts: 1225
Location: Scottish Borders
Audio files: 160
|
|
|
Back to top
|
|
|
Skrog Productions
Joined: Jan 07, 2009
Posts: 1225
Location: Scottish Borders
Audio files: 160
|
|
|
Back to top
|
|
|
blue hell
Site Admin

Joined: Apr 03, 2004
Posts: 24599
Location: The Netherlands, Enschede
Audio files: 309
G2 patch files: 320
|
| Posted: Sun May 04, 2014 8:19 am Post subject:
|
|
|
Nice track! and that wall of synth is getting very impressive 
edit: some nice patterns on the gate sequencer test mp3s.
_________________
Jan
also .. could someone please turn down the thermostat a bit.
 |
|
|
Back to top
|
|
|
Skrog Productions
Joined: Jan 07, 2009
Posts: 1225
Location: Scottish Borders
Audio files: 160
|
| Posted: Sun May 04, 2014 8:22 am Post subject:
|
|
|
Thanks Jan , , glad you enjoyed the track
Dave. |
|
|
Back to top
|
|
|
Cynosure
Site Admin

Joined: Dec 11, 2010
Posts: 1026
Location: Toronto, Ontario - Canada
Audio files: 82
|
| Posted: Sun May 04, 2014 8:32 am Post subject:
|
|
|
| Awesome track! Just what we needed for the new playlist |
|
|
Back to top
|
|
|
Skrog Productions
Joined: Jan 07, 2009
Posts: 1225
Location: Scottish Borders
Audio files: 160
|
| Posted: Sun May 04, 2014 8:33 am Post subject:
|
|
|
Thanks Jake
Dave. |
|
|
Back to top
|
|
|
|

 Forum index » DIY Hardware and Software » Ken Stone designs - CGS